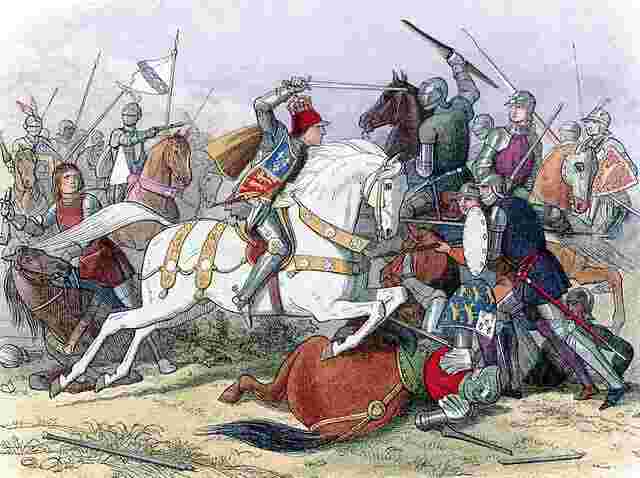
The Battle of Bosworth was fought on 22 August 1485. It saw an army of King Richard III defeated by that of Henry Tudor. The Battle of Bosworth resulted in the death of Richard III and the beginning of the Tudor Dynasty. Intervention by Sir William Stanley and his retinue on behalf of the Tudor army contributed to the outcome.
Build up to the Battle of Bosworth
That Henry Tudor was planning an invasion to try and seize the Crown was well known. Richard III was aware of the support that Henry was receiving. The threat of an invasion promoting the claim of Henry Tudor had grown following the failure of the Buckingham Rebellion. Lancastrians in exile, disgruntled Yorkists, and some members of the Woodville family and affinity had united in opposition to Richard’s rule.
Support for Henry Tudor
The growth in support for Henry Tudor whilst in exile was accompanied by diplomatic overtures that resulted in assistance for his cause coming from the King of France. A fleet was prepared, which Richard was aware of. Links were forged between the formidable Lady Margaret Beaufort and the Dowager Queen Elizabeth Woodville. These resulted in agreements intended to unite the warring factions in the event of Henry seizing the Crown. Key to this, was the plan of a marriage between Henry Tudor and Elizabeth of York should Richard III be deposed.

Richard’s preparations to face an invasion
Aware of the military build up and conscious of supporters of the Buckingham Rebellion having joined with Henry Tudor, Richard III made plans to counter the threat. He placed Viscount Francis Lovell in command of defending the South Coast of England. Men such as William Herbert Earl of Pembroke were given similar duties in southern Wales. Coastal defences were checked along the east coast, with fleets gathered at places as far north as Scarborough to tackle any Tudor invasion.
Call to Arms
Proclamations were also made. These ranged from denunciations of Henry Tudor, to anti-sedition statements, to calls on the people to ready themselves for the defence of the realm. As the invasion became more imminent, messengers were dispatched to call for increased alertness. And, as news reached Richard at Nottingham of the invasion fleet having landed at Milford Haven, calls to arms were dispatched.
Securities
King Richard III also took steps to try and minimise the size and effectiveness of Tudor’s army. He attempted to bring the Earl of Oxford to the Tower of London from his imprisonment in the Pale of Calais: but failed, John de Vere escaped before the order reached Calais. Similarly he took steps to nullify the risk of Thomas Lord Stanley siding with the invader. Stanley was married to Lady Margaret Beaufort, mother of Henry Tudor. His loyalty had been questioned previously, his wife had been implicated in the Buckingham Rebellion. His son, George Lord Strange, was held as a captive by King Richard as security for Thomas Stanley’s actions.
The Battle of Bosworth
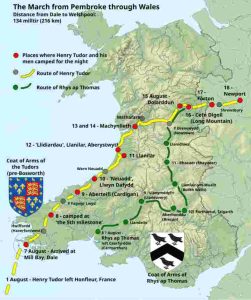
Henry Tudor’s rebel army had moved north through Wales, then headed east into England. From Shrewsbury they had marched in a south easterly direction. Richard had been based in Nottingham. As the invaders moved south, he moved his force to block their path.
Royal Army moves to block the invaders
Whilst Richard did not have all of the men that he had called upon in his camp, his force was considerably larger than that of Henry Tudor. This provided confidence to tackle the threat. Richard and his commanders chose to do so near Market Bosworth.
Deployment at the Battle of Bosworth
The way in which the two armies deployed at Bosworth is not entirely clear. We know that the Duke of Norfolk commanded the vanguard of King Richard’s army. The Earl of Northumberland held the reserve. King Richard III is thought to have held a position behind the main body of his army, accompanied by a squadron of cavalry. On the side of Henry Tudor the formation is believed to have been much narrower. Most of the force would have been in the vanguard, commanded by the Earl of Oxford.
Battlefield Tactics at Bosworth
Having chosen the battlefield and with a much larger force, accompanied by artillery, the odds seem to have been stacked heavily in Richard III’s favour. However, the battle did not go according to Richard’s plan.
Henry Tudor’s army did not march head on at the centre of Richard’s front line. Instead, it is believed that after firing a burst of artillery, they pivoted and aimed at the right flank of the royal army. This enabled them to gain safety from marshland to one side, and forced the army of Richard III to realign itself as their enemy engaged.
Initative taken and Richard’s advantages lost
The width of the initial deployment by the defending royal army had now lost it’s advantage. Fighting on a narrow front with no scope to outflank the Tudor force, the odds had been evened out. For Richard’s force it would have been difficult to move forces into position, making the traditional deployment of a vanguard, main force and reserve less effective.
The Earl of Oxford’s force formed a wedge and drove into the vanguard of the Duke of Norfolk. This formation was effective, threatening to split the defensive lines. Though sources are not entirely conclusive on what happened next, it appears that this prompted Richard III to launch the cavalry charge which led to his death.
For more depth, see The Battlefields Trust
Why did Richard III lead a cavalry charge at Bosworth?
If the defensive line of the Duke of Norfolk was under threat of collapse from a wedge formation, it needed shoring up. One way to stop the advance of the tightly packed wedge is to hit it hard. A cavalry charge would potentially solve the problem. The impetus of the wedges advance would be slowed if not stopped. If the wedge does not hold against the cavalry it is then very susceptible to being overwhelmed.
It is also thought that as the Tudor force advanced in this manner that it opened a narrow window of opportunity to strike at the heart of Henry Tudor’s command position. In this case, Richard can win a victory by simply charging down his enemies commanders. If the cavalry charge takes out Henry Tudor, the enemies cause is lost.
Death of Richard III
In the heat of battle the decision was taken by Richard to use a cavalry charge. It drove towards Henry Tudor’s position. But, it did not reach him. Instead, it was Richard III who fell. The charge halted by Tudor’s bodyguard, Richard III was killed on the battlefield.
Contemporary Sources and the Battle of Bosworth
The source material on the Battle of Bosworth, like all battles of the period, is not particularly specific on many key details. This includes the numbers of men in each of the armies. Totals given in contemporary and near contemporary sources do not support each other particularly well and in the case of Molinet, contradicts itself. Mike Ingram assessed the source material on the battle and compared it to archaeological records to reach some informed conclusions as to the size of the forces deployed. This can be read on the Richard III Society website here. The Battlefields trust also explores issues with the source material, here.
Aftermath of the Battle
In the immediate aftermath of the Battle of Bosworth, a rout saw some of Richard’s force flee and others cut down. Notable men such as the Earl of Northumberland were taken captive.
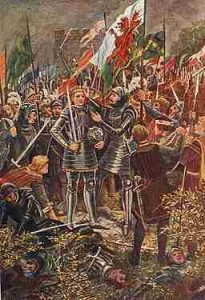
Legend and Shakespeare have it that as the dust settled on the field of battle, Thomas Lord Stanley placed the Crown on Henry Tudor’s head. What is certain is that the crown changed hands on that day.
Richard III’s remains and resting place
The remains of King Richard III were taken by the victorious Tudor force to Leicester. His remains were laid to rest in the church of Greyfriars Friary. At a later date Henry Tudor paid for a tombstone to be placed on his predecessors grave. This marker was lost in the aftermath of the Dissolution of Greyfriars. In turn this led to the location of Richard’s grave was lost from public view and consciousness. It was found in 2012 following work by the Finding Richard Project and the University of Leicester.
Battle of Bosworth Books
Gravett, Christopher (Author) and Turner, Graham (Illustrations).
Ingram, Mike. Richard III and the Battle of Bosworth: 10 (Retinue to Regiment)
Featured Image
King Richard III at Bosworth Field. This engraving was published in: Doyle, James William Edmund (1864) “Richard III” in A Chronicle of England: B.C. 55 – A.D. 1485, London: Longman, Green, Longman, Roberts & Green, pp. p. 453. Public Domain, via Picryl.